In this article, we are going to demonstrate how to deploy a web application in AKS (Azure Kubernetes Service) .
Azure Kubernetes Service
Azure Kubernetes Service is a managed container orchestration service based on the open source Kubernetes system, which is available on the Microsoft Azure public cloud. An organization can use AKS to handle critical functionality such as deploying, scaling and managing Docker containers and container-based applications.
Azure Container Registry

Azure Container Registry
Azure Container Registry is a private registry service for building, storing, and managing container images and related artifacts. In this quickstart, you create an Azure container registry instance with the Azure portal.
Now we are going to push our images into the container registry:
docker push myprivaterepo.azurecr.io/client
docker push myprivaterepo.azurecr.io/server
Now we can see our images pushed successfully to the remote registry :

Create our Kubernetes cluster
We are going now to create our cluster, we connect to the azure portal then we search for kubernetes service .
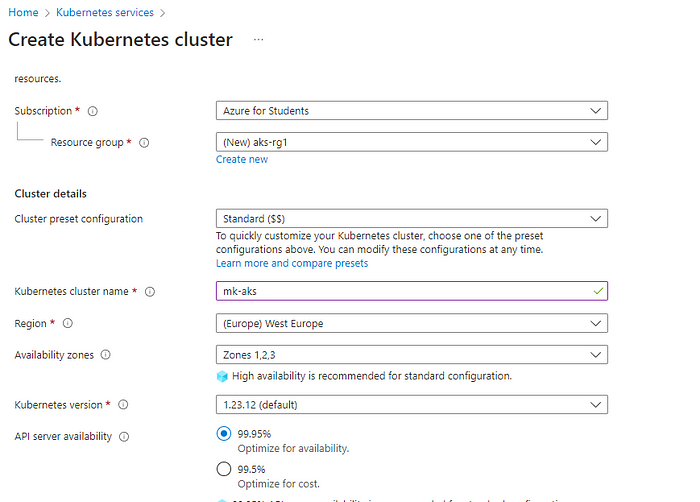
For the main page, we set the resource group and the cluster name. For the node agent, we set it to Standard_B2s which is the cheapest one available :

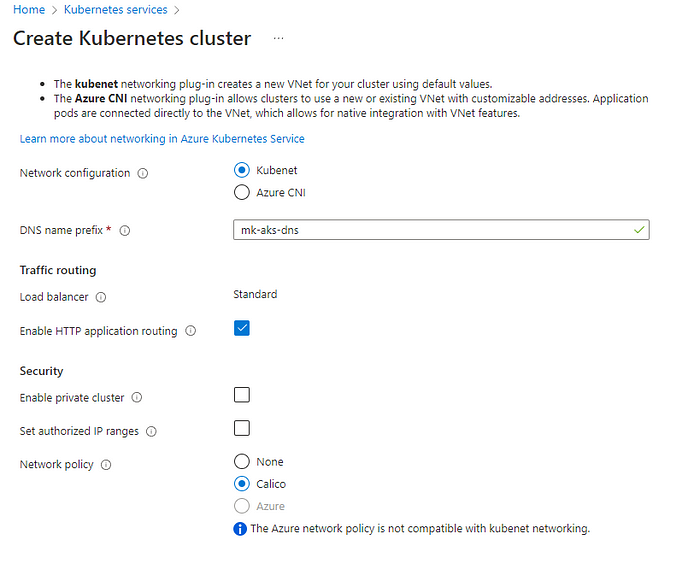
For networking inside the cluster, we used the default Kubenete network configuration and Calico for connectivity between pods and services :
Finally, we connect our docker registry to the cluster so we can pull images :
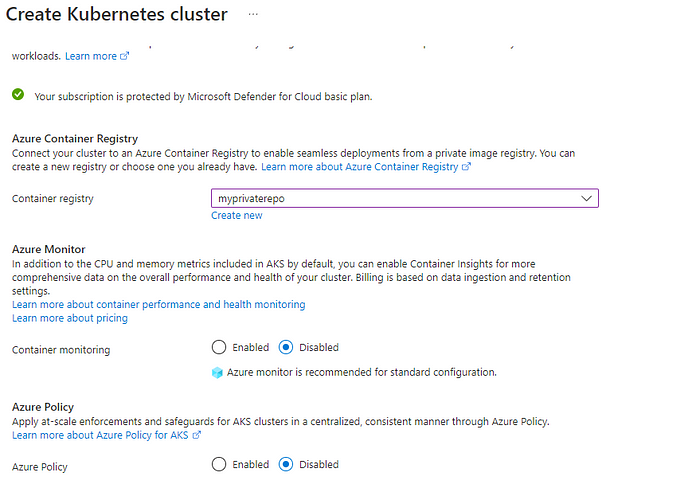
and we hit Create .
Deploy the app
Now, we need to connect to the cluster
az account set –subscription ####################
az aks get-credentials –resource-group aks-rg1 –name mk-aks
We deploy our deployments and services using :
kubectl apply -f .\client-deploy.yaml
kubectl apply -f .\server-deploy.yaml
kubectl apply -f .\client-svc.yaml
kubectl apply -f .\server-svc.yaml
Note : We are going to use the public cloud LoadBalancer to achieve that our front is served in the internet .
Nginx reverse-proxy :
nginx
To achieve forwarding the API requests to our ClusterIP backend, we are going to use a nginx server which we will serve as a reverse-proxy .
a reverse proxy is the application that sits in front of back-end applications and forwards client (e.g. browser) requests to those applications. Reverse proxies help increase scalability, performance, resilience and security. The resources returned to the client appear as if they originated from the web server itself.
My nginx.conf :
server {
listen 80;
location /api {
    proxy_http_version 1.1;
    proxy_set_header Upgrade $http_upgrade;
    proxy_set_header Connection "upgrade";
    proxy_set_header Host $host;
    proxy_cache_bypass $http_upgrade;
    proxy_pass http://${API}:${PORT}/api;
}

location / {
    root /usr/share/nginx/html;
    index index.html index.htm;
    try_files $uri $uri/ /index.html;
}

error_page 500 502 503 504 /50x.html;

location = 50x.html {
    root /usr/share/nginx/html;
}
}
In this configuration, every request for “/api” we will be forwarded to “http://${API}:${PORT}/api”. For example, a request a /api/user will be forwarded to http://${API}:${PORT}/api/user .
Testing out things :
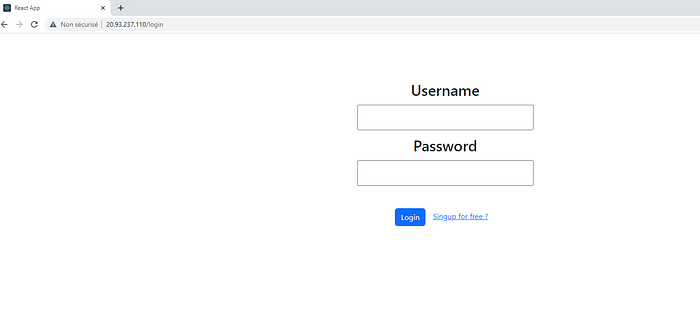
So, our services are now available and we can see our the public IP of our loadbalancer that serves our frontend application :

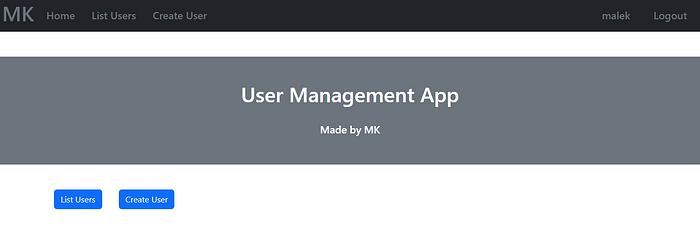
we access it and our application is running successfully :
We try to create and account and login :
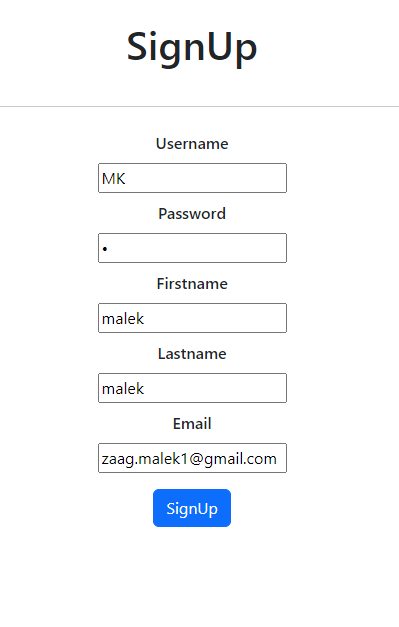
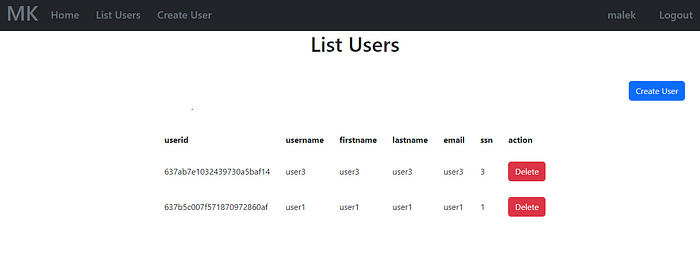
Now we create a new user to test our API :
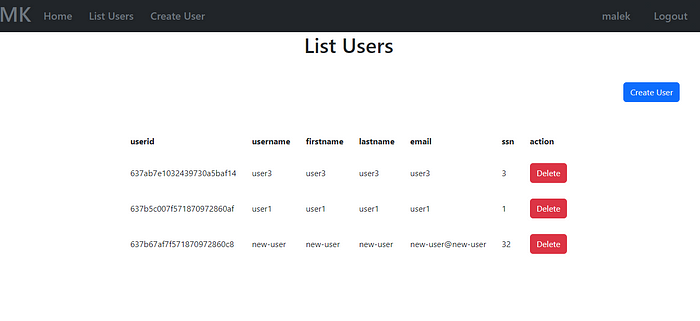
and our API works successfully :
I hope you enjoyed reading the article and you learnt how to deploy a fullstack web application using the Azure Kubernetes Service .